How Long Does It Take to Replace an HVAC System?
Replacing an HVAC system is a significant home improvement project that requires careful planning. The time it takes to complete the replacement can vary widely, from as little as 4-8 hours for simple installations to several days or even beyond a week for more complex cases.
Understanding the factors that influence the duration of an HVAC system installation is crucial for homeowners. These factors include the type of system, the size of the home, and the existing infrastructure.
Knowing what to expect during the process helps homeowners prepare and minimize disruptions to their daily routines.
Key Takeaways
- The duration of an HVAC system replacement varies widely depending on multiple factors.
- A standard replacement might take just 4-8 hours for simple installations.
- Complex systems can require several days to complete.
- Understanding the replacement timeline is crucial for homeowners planning this significant home improvement project.
- Knowing what to expect during the replacement process helps homeowners prepare adequately.
Understanding the HVAC Replacement Process
To navigate the HVAC replacement process effectively, it’s essential to know what the process involves and why timing is crucial. Replacing anHVAC systemis a significant investment in your home’s comfort and efficiency.
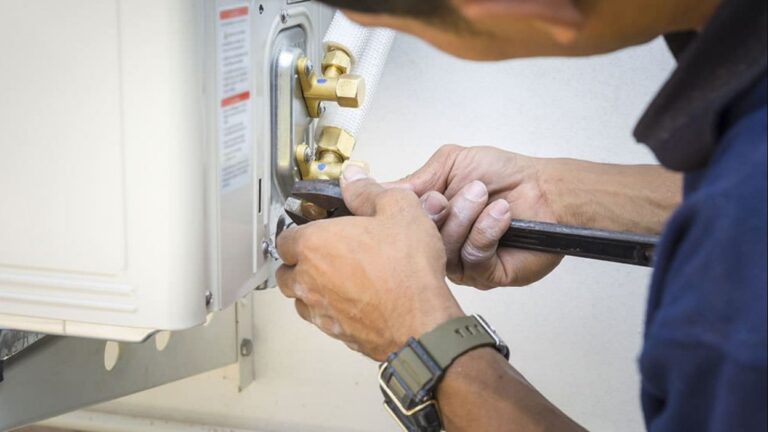
What HVAC Replacement Involves
In simple terms, HVAC replacement involves removing the old heating and air conditioning system and installing a new one to ensure efficient climate control and air quality in your home. This process requires careful planning and execution to minimize disruption to your daily life.
The replacement process begins with assessing your current system and determining the best replacement options for your home. This includes selecting a new HVAC system that meets your needs and budget.
Why Timing Matters for Homeowners
The timing of your HVAC replacement can significantly impact your comfort, especially during extreme weather seasons. Planning your replacement during moderate weather seasons can prevent discomfort from being without heating or cooling during installation.
- Understanding the timeline helps homeowners coordinate their schedules to be present for important decisions during the installation process.
- Proper timing allows for adequate preparation, including clearing work areas and making arrangements for family members and pets.
- Knowing how long the process takes helps homeowners plan for any necessary temporary accommodations if the replacement extends beyond a single day.
Typical HVAC Replacement Timeline Overview

Understanding the typical timeframe for HVAC replacement is crucial for homeowners planning to upgrade their heating and cooling systems. The duration of the replacement process can vary based on several factors.
Average Timeframes for Different System Types
Different HVAC systems have distinct installation timeframes. For instance, replacing a standard central air conditioning unit generally takes less time compared to more complex systems like heat pumps or geothermal units.
For a standard air conditioner replacement, expect the process to take about 4 to 8 hours. More complex systems require additional time due to their intricate installation processes.
| System Type | Average Replacement Time |
|---|---|
| Central Air Conditioning Units | 4-8 hours |
| Heat Pumps | 8-14 hours |
| Geothermal Systems | 3-7 days |
Best Seasons for HVAC Replacement
The timing of HVAC replacement can significantly impact the overall experience. Spring and fall are typically considered the ideal seasons for HVAC replacement. These periods offer moderate temperatures and often more flexible scheduling with contractors.
- Planning your replacement during the off-season can result in faster service and possibly better pricing from HVAC contractors.
- Replacing your heating system in late summer or early fall ensures you’re prepared before the cold weather arrives.
- Similarly, replacing your air conditioning in late winter or early spring means you’ll be ready when temperatures start to rise.
5 Signs It’s Time to Replace Your HVAC System
Your HVAC system is crucial for your home’s comfort, but how do you know when it’s time to replace it? Understanding the signs that indicate the need for a new system can help you make an informed decision and avoid unexpected breakdowns. A well-functioning HVAC system is essential for maintaining a comfortable indoor environment, and recognizing when it’s time to replace it is vital for homeowners.
Age of Your Current System
The age of your HVAC system is a critical factor in determining whether it’s time for a replacement. Most systems have a lifespan of 15 to 20 years, depending on the type and maintenance. As your system approaches the end of its expected lifespan, it becomes less efficient and more prone to breakdowns. If your system is nearing or has exceeded its average lifespan, it’s wise to start considering a replacement.
Rising Energy Bills
A noticeable increase in your energy bills could be a sign that your HVAC system is losing efficiency. As systems age, they often require more energy to heat or cool your home to the desired temperature. If you notice a steady rise in your energy costs without a corresponding increase in usage, it may be time to consider a more efficient system.
Frequent Repairs and Breakdowns
If you find yourself scheduling repair services frequently, it might be more cost-effective in the long run to replace your HVAC system. Frequent breakdowns not only increase your maintenance costs but also disrupt your comfort. A new system can provide reliability and reduce the need for constant repairs.
Uneven Heating or Cooling
Uneven heating or cooling throughout your home can be a sign of a failing HVAC system. If some rooms are consistently warmer or cooler than others, it may indicate that your system is struggling to distribute air effectively. This issue can be due to various factors, including ductwork problems or a failing system. A new HVAC system can provide more consistent and reliable temperature control.
Strange Noises or Odors
Unusual sounds or smells coming from your HVAC system can indicate serious issues. Grinding, squealing, or banging noises often signal mechanical problems that may be costly to repair. Musty odors can indicate mold growth in your system or ductwork, posing health risks to your family. Burning smells might suggest electrical problems that could present safety hazards. As systems age, they typically become louder and develop more unusual operating sounds. New systems, on the other hand, operate much more quietly, with advanced sound-dampening technology in premium models.
Recognizing these signs early can help you plan for a replacement and avoid being caught off guard by a system failure. By understanding the condition of your HVAC system and addressing issues promptly, you can ensure a comfortable and safe indoor environment for you and your family.
Additional Warning Signs Your HVAC Needs Replacement
Beyond the usual signs, there are additional indicators that your HVAC system may need replacement. While many homeowners are aware of the common signs of HVAC failure, there are other critical indicators to watch out for that can signal the need for a new system.
Poor Indoor Air Quality and Humidity Issues
Poor indoor air quality and humidity issues can be a sign of a failing HVAC system. If your system is not effectively controlling humidity, it can lead to mold growth and other issues. Modern HVAC systems are designed to not only heat and cool but also to improve indoor air quality.
System Short Cycling
System short cycling, where your HVAC system turns on and off frequently, is another warning sign. This can be due to a variety of issues, including an oversized system or a malfunctioning thermostat. Short cycling can lead to increased energy bills and reduced system lifespan.
Visible Damage or Leaks
Visible damage or leaks in your HVAC system are clear indicators that it may need to be replaced. While minor condensation around your cooling system is expected, heavy drainage or leaks are signals of an issue with your HVAC. A drainage tube is a critical component that draws condensation away from your cooling system and outside your home.
| Signs of Visible Damage or Leaks | Description | Potential Consequences |
|---|---|---|
| Visible Rust or Corrosion | Rust, cracks, or corrosion on HVAC components | Advanced deterioration, system failure |
| Refrigerant Leaks | Leaks of refrigerant from the system | Damage to the system, environmental concerns |
| Water Leaks | Water leaks around the indoor unit | Property damage, drain line problems, condensate pump failures |
Modern systems are designed with improved materials and components that resist corrosion and leakage issues, making them a worthwhile investment for homeowners looking to replace their outdated HVAC systems.
Repair vs. Replace: Making the Right Decision
The choice between repairing and replacing an HVAC system depends on several key factors that homeowners must consider. To make an informed decision, it’s essential to weigh the pros and cons of each option carefully.
Several factors come into play when deciding whether to repair or replace your HVAC system. The age of your current unit, its maintenance history, and your future plans for the home are all crucial considerations.
When Repairs Make Sense
Repairs are often the most cost-effective solution if your HVAC system is relatively new and the issue is minor. If the repair costs are less than 50% of the system’s value and it’s still under warranty or relatively young (less than 10 years old), fixing it might be the way to go.
When Replacement Is the Better Option
On the other hand, if your HVAC unit is 10-20 years or older, has required frequent repairs, or uses outdated refrigerants like R-22 or R-410A, it might be time to consider replacement. Additionally, if you’re planning to stay in your home for 7 or more years, investing in a new system can provide long-term benefits, including energy savings and improved comfort.
Cost-Benefit Analysis of Both Options
Conducting a thorough cost-benefit analysis is vital. Consider not just the immediate repair costs but also the long-term savings potential of a new system. Energy savings from modern HVAC systems can range from 20-50% compared to older models. Factor in available rebates, tax credits, and manufacturer incentives when calculating replacement costs. Consider the improved comfort, reliability, and reduced maintenance needs of a new system in your decision.
Financing options can make replacement more affordable by spreading costs over time while you begin enjoying energy savings immediately. It’s also worth noting that newer systems often come with warranties, providing peace of mind and protection against future repair costs.
Factors That Influence Your HVAC Replacement Timeline

Several key factors can impact the duration of your HVAC replacement project. Understanding these elements can help you plan and prepare for the installation process.
Home Size and Layout Considerations
The size and layout of your home play a significant role in determining the complexity and duration of the replacement process. Larger homes or those with complex layouts may require more time and labor to install a new HVAC system.
System Type and Complexity
The type and complexity of the HVAC system you’re installing can significantly affect the replacement timeline. More complex systems, such as geothermal or ductless mini-split systems, may require additional work and expertise, potentially extending the installation time.
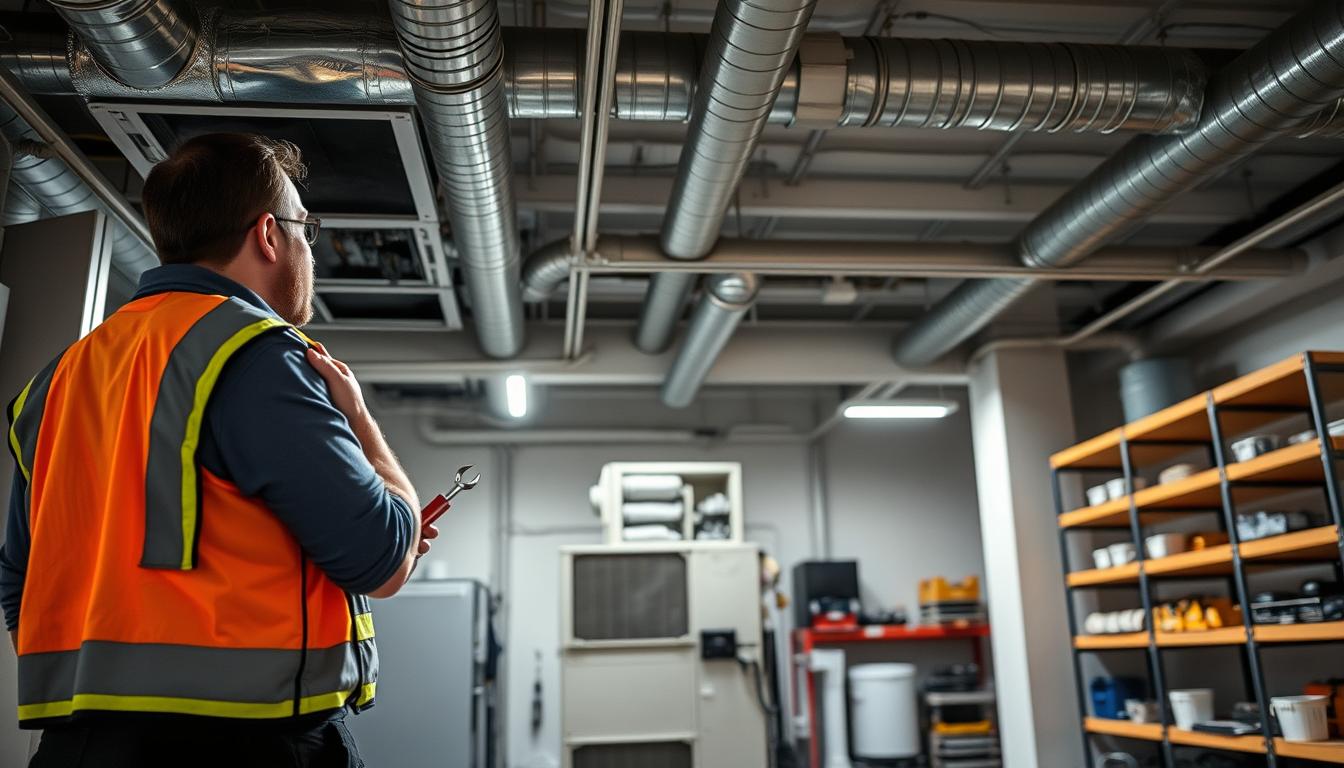
Ductwork Condition and Accessibility
The condition and accessibility of your ductwork can also impact the replacement timeline. If your ductwork is in poor condition or difficult to access, additional repairs or modifications may be necessary, adding to the overall time required for the project.
Permit and Inspection Requirements
Obtaining necessary permits and undergoing inspections are crucial steps in the HVAC replacement process. Local building codes often require permits for HVAC replacements, which can add days or weeks to your timeline. The permit application process varies by municipality, with some offering expedited options for an additional fee.
Most jurisdictions require inspections after installation to ensure code compliance, which must be scheduled after completion. Failed inspections can result in additional work and re-inspection, extending your project timeline. Working with experienced contractors familiar with local requirements helps minimize permit-related delays.
By understanding these factors and working with a qualified HVAC professional, you can better plan for your HVAC replacement and minimize potential delays.
Breaking Down the HVAC Replacement Timeline by System Type
The time it takes to replace an HVAC system varies significantly depending on the type of system being installed. Different systems have unique requirements and complexities that affect the overall installation time.
Understanding these differences is crucial for homeowners to plan and prepare for the replacement process effectively.
Central Air Conditioning Units (4-8 Hours)
Replacing a central air conditioner typically takes between 4 to 8 hours. This timeframe includes the removal of the old unit and the installation of the new one.
The process involves connecting the new unit to the existing ductwork and ensuring proper electrical connections.
Furnace Replacement (4-10 Hours)
Furnace replacement can take anywhere from 4 to 10 hours. The variation in time is often due to the complexity of the furnace model and the need for additional modifications to the existing heating infrastructure.
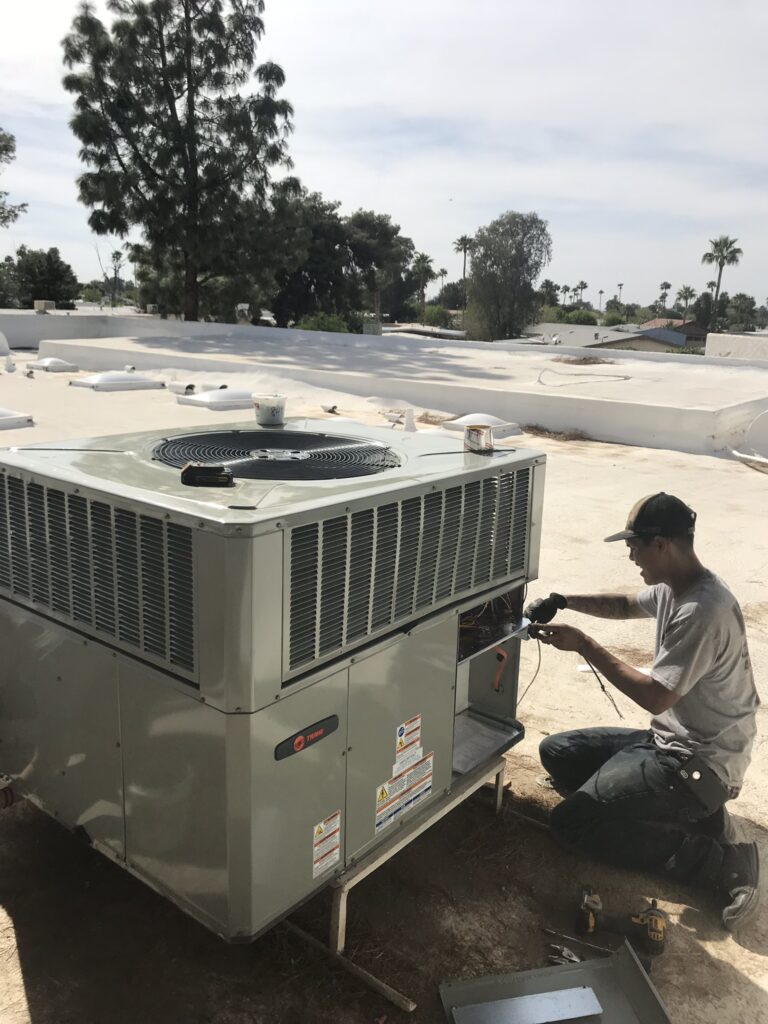
Heat Pump Installation (8-14 Hours)
Heat pump installations generally require more time, typically ranging from 8 to 14 hours. This is because heat pumps involve both indoor and outdoor components that need to be connected and tested.
Ductless Mini-Split Systems (1-2 Days)
Ductless mini-split systems can take around 1 to 2 days to install. The process involves mounting indoor units, installing outdoor compressors, and connecting the refrigerant lines.
Geothermal Systems (3-7 Days)
Geothermal systems are among the most complex and time-consuming to install, requiring 3 to 7 days or more. The majority of the time is spent on ground loop installation, which involves extensive excavation or drilling.
- The ground loop installation can be either horizontal, requiring significant trenching, or vertical, necessitating deep drilling.
- After the loop installation, connecting and commissioning the heat pump equipment takes an additional day.
- Weather conditions and soil type can significantly impact the timeline for the excavation portion of the installation.
By understanding these timelines, homeowners can better plan for the replacement of their HVAC system, ensuring minimal disruption to their daily lives.
The Complete HVAC Replacement Process Step by Step

Homeowners can benefit from knowing the step-by-step process involved in replacing their HVAC system. This knowledge helps in understanding the timeline, costs, and what to expect during the replacement process.
Initial Assessment and Consultation
The first step in the HVAC replacement process is an initial assessment and consultation, which typically takes 1-2 hours. During this visit, a professional will evaluate your current system, discuss your heating and cooling needs, and provide recommendations for the new system.
System Selection and Sizing
After the initial assessment, the next step is system selection and sizing, which involves a Manual J calculation to determine the correct size and type of HVAC system for your home. This step is crucial for ensuring the new system operates efficiently and effectively.
Obtaining Permits
Obtaining necessary permits can add time to the process. The time frame for permits can vary depending on local regulations, potentially adding a few days to a couple of weeks to the overall timeline. It’s essential to factor in this step when planning your HVAC replacement.
Scheduling and Preparation
Once permits are secured, the installation can be scheduled, typically 1-3 weeks from the initial consultation. Peak seasons (summer and winter) often have longer scheduling delays due to high demand. Your contractor will provide specific instructions for preparing your home before installation day, including clearing access paths to work areas and protecting furniture and belongings. The day before installation, the contractor may deliver equipment and materials to expedite the process.
On the day of installation, being prepared can make the process smoother. Homeowners should ensure that the work areas are accessible and that pets and family members are kept away from the work zones. Understanding these steps can help make the HVAC replacement experience less stressful and more efficient, typically taking a day or more depending on the complexity of the job.
What Happens on Installation Day
On installation day, homeowners can expect a thorough process to ensure their new HVAC system is installed correctly and functions optimally. This day marks the culmination of the replacement process, bringing improved performance and energy efficiency to the home.
Removal of Old System
The first step on installation day is the removal of the old HVAC unit. This process typically takes 2-3 hours, depending on the complexity of the system and the accessibility of the installation area. Technicians will carefully disconnect and remove the old unit, taking care to handle any hazardous materials appropriately.
Installation of New Components
Following the removal of the old system, technicians will proceed with the installation of the new components. This step usually takes 2-4 hours and involves installing the new HVAC unit, connecting it to the ductwork, and ensuring proper airflow throughout the home.
Testing and Calibration
After the new system is installed, technicians will thoroughly test it to ensure it operates correctly. This includes checking the airflow, ensuring the system is charged with the appropriate refrigerant, and adjusting the thermostat settings. This step is crucial for the optimal performance of the new HVAC unit and typically takes 1-2 hours.
Final Walkthrough and Education
The installation concludes with a comprehensive walkthrough of your new system. Technicians will demonstrate how to operate your new thermostat, explain programming features, and provide information about maintenance requirements, including filter replacement schedules. You’ll also receive details about warranty coverage and registration procedures. This is your opportunity to ask questions about system operation and maintenance responsibilities, ensuring you’re fully prepared to enjoy your new HVAC unit on this significant day.
HVAC Replacement Timeline Complications
The duration of an HVAC replacement project can be influenced by several factors, including the need for ductwork modifications or electrical upgrades. While a straightforward replacement might take only a few hours, complications can arise that extend the installation time and impact the overall work required.
Ductwork Modifications or Replacement
If your home requires ductwork upgrades or replacements, this can significantly increase the installation time. Replacing ductwork can take anywhere from a few extra hours to a full day, depending on the size and layout of your home. In some cases, ductwork modifications can add 1-3 days to the overall HVAC replacement timeline.
Electrical Upgrades
Sometimes, the existing electrical infrastructure may not be sufficient to support the new HVAC system. Electrical upgrades can add 4-8 hours to the installation work, as they require specialized labor and may involve obtaining additional permits.
Structural Modifications
Occasionally, structural modifications are necessary to accommodate new HVAC equipment. These modifications might include:
- Enlarging an attic access
- Creating a new equipment pad
- Reinforcing flooring
- Converting from one system type to another (like adding central air to a home with only heating)
- Creating new chases for ductwork in finished areas
Historic homes often present unique structural challenges that can extend the installation timeline considerably. It’s essential to work with an experienced HVAC professional who can assess your home’s specific needs and provide a more accurate estimate of the time required for the replacement.
Calculating HVAC Replacement Costs in 2024

Replacing an HVAC system is a significant investment, and understanding the costs involved is vital for making an informed decision. The cost of a new HVAC system can vary significantly based on several factors, including the type of system, its complexity, and the size of your home.
Average Cost Ranges by System Type
The cost of HVAC replacement can range from $2,500 to over $45,000. Here’s a breakdown of average cost ranges for different system types:
- Gas Furnace: $3,800 – $12,000
- Ductless Mini Splits: $2,000 – $10,500
- Oil Furnace: $2,500 – $10,000
- Central AC: $3,000 – $15,000
- Heat Pump: $6,000 – $25,000
- Geothermal Heat Pump: $12,000 – $45,000
Additional Costs to Consider
When budgeting for HVAC replacement, it’s essential to consider additional costs beyond the initial system price. These may include ductwork modifications, electrical upgrades, and permit fees.
Financing Options and Rebates
Various financing options can make new HVAC systems more affordable for homeowners. Some of these include:
- Manufacturer financing with promotional rates like 0% interest for qualified buyers
- Utility company rebates for high-efficiency system installations, ranging from $300-$1,500
- Federal tax credits for qualifying energy-efficient systems
- State and local government incentives for energy-efficient home improvements
By understanding these costs and exploring available financing options and rebates, homeowners can make a more informed decision when replacing their HVAC system.
How to Prepare Your Home for HVAC Replacement
Before the HVAC technicians arrive, there are several things you can do to prepare your home for a replacement. This preparation not only ensures a smooth installation process but also helps in minimizing disruptions to your daily routine.
Clearing Access to Work Areas
One of the first steps in preparing your home is to clear access to the areas where the HVAC technicians will be working. This includes removing any obstacles or clutter around the HVAC system, both indoors and outdoors. By doing so, you facilitate a more efficient work environment for the technicians, potentially reducing the time required for the installation.
Protecting Furniture and Belongings
HVAC installation can be disruptive to your normal household routine. To protect your furniture and belongings from dust and debris, consider covering them with sheets or plastic covers. It’s also a good idea to remove any valuable or sensitive items from the surrounding areas to prevent accidental damage.
Making Arrangements for Pets and Family
For a successful HVAC replacement, it’s essential to make arrangements for pets and family members. Consider arranging for pets to stay elsewhere during the installation to prevent stress and ensure they don’t interfere with the work. Inform your family about the installation schedule so they can plan accordingly. If you work from home, consider making alternative arrangements on the installation day due to noise and activity. For installations during extreme weather, have a contingency plan for family members sensitive to temperature fluctuations.
| Preparation Task | Description | Benefit |
|---|---|---|
| Clear Access | Remove obstacles around HVAC system | Efficient work environment |
| Protect Belongings | Cover furniture and remove valuables | Prevents damage and dust accumulation |
| Arrange for Pets and Family | Plan for pets and inform family | Reduces stress and disruption |
By taking these steps, you can help ensure a successful HVAC replacement in your home, minimizing the impact on your daily life and ensuring that your new HVAC system is installed efficiently.
Choosing the Right HVAC Contractor for Efficient Installation

Finding the ideal HVAC contractor involves more than just comparing prices; it requires thorough research and evaluation. A well-chosen contractor can ensure that your new HVAC system is installed correctly, functions optimally, and provides the expected comfort and energy efficiency.
Qualifications to Look For
When searching for an HVAC contractor, it’s essential to look for certain qualifications. These include proper licensing, insurance, and certifications from reputable organizations such as NATE (North American Technician Excellence). A qualified technician should also have experience with installations similar to yours.
Questions to Ask Potential Contractors
To gauge a contractor’s suitability, ask pertinent questions about their experience, work process, and policies. Inquire about their approach to your specific installation needs, the timeline for the project, and the details of their warranty and maintenance services.
Reading Reviews and Checking References
One of the most effective ways to assess a contractor’s reliability and quality of work is by reading online reviews and checking references. Look for reviews on multiple platforms like Google, Yelp, and the Better Business Bureau. Pay particular attention to feedback regarding the contractor’s installation quality, adherence to timelines, and customer service.
By thoroughly researching potential contractors, checking their qualifications, asking the right questions, and reading reviews, you can ensure a smooth and efficient HVAC installation experience.
Post-Installation: What to Expect
Post-installation care is crucial for your new HVAC system‘s efficiency and lifespan. After the installation of your new HVAC system, several steps can be taken to ensure it operates at its best.
System Break-In Period
The initial period after installation is critical for your system. It’s essential to monitor its performance and report any issues to your technician.
Initial Adjustments and Fine-Tuning
Your new unit may require some fine-tuning to optimize its performance. This could involve adjusting settings or making minor adjustments to ensure it’s working correctly.
Warranty Registration and Documentation
Proper documentation and warranty registration are essential steps after installation. Register your equipment warranty promptly—many manufacturers require registration within 60-90 days. Keep all paperwork related to your new system, including manuals, warranty information, and installation documentation. For more information on what to expect before, during, and after your HVAC system installation, visit this page.
Some key steps to follow include:
- Keeping all paperwork related to your new system in one place.
- Storing your contractor’s contact information with your system documentation.
- Establishing a maintenance schedule and keeping records of all service.
| Task | Timeline | Responsibility |
|---|---|---|
| Warranty Registration | Within 60-90 days | Homeowner |
| Initial Maintenance Check | After 1 month | Technician |
| Regular Maintenance | Annually | Homeowner/Technician |
Maximizing Your New HVAC System’s Efficiency and Lifespan
Maximizing your new HVAC system’s efficiency and lifespan begins with proper maintenance and usage habits. A well-maintained system not only provides optimal comfort but also reduces energy consumption and prolongs its operational life.
Regular Maintenance Schedule
Establishing a regular maintenance schedule is crucial for your system‘s performance. This includes annual inspections by a professional to ensure that all components are functioning correctly and efficiently. Regular maintenance can help identify potential issues before they become major problems.
Filter Replacement Guidelines
One of the simplest yet most effective ways to maintain your system is by regularly replacing the air filters. Dirty filters can restrict air flow, causing your system to work harder and consume more energy. It’s recommended to check and replace filters every 1-3 months, depending on usage and manufacturer guidelines.
Thermostat Programming Tips
Proper thermostat programming can significantly impact both comfort and energy efficiency. To maximize energy savings, program temperature setbacks of 7-10 degrees when you’re away or sleeping. Avoid frequent manual temperature adjustments, which can increase energy usage. If you have a zoned system, set each zone according to its specific usage patterns and requirements. Consider investing in a smart thermostat, which can learn your preferences and automatically optimize settings for comfort and efficiency.
- Program temperature setbacks to maximize energy savings.
- Avoid frequent manual temperature adjustments.
- Use zoned systems according to specific usage patterns.
- Consider investing in a smart thermostat for optimized settings.
Planning Your HVAC Replacement for Minimal Disruption
Effective planning is essential to ensure that your HVAC replacement project is completed efficiently and with minimal impact on your home. By understanding the process and time required for the replacement, you can prepare accordingly.
One key aspect is scheduling the replacement during moderate seasons, such as spring or fall, when being without heating or cooling is less problematic. This allows for a more comfortable experience during the installation time. Additionally, consider scheduling the installation when you can be present but family members who are sensitive to noise or temperature fluctuations are away.
To minimize disruption, it’s also crucial to communicate any scheduling constraints or concerns with your contractor before finalizing installation dates. Creating a temporary comfort plan for installation day, such as using portable fans or heaters, can also help. If you work from home, consider arranging to work elsewhere during the noisiest portions of the installation.
For installations during extreme weather, having a backup plan, such as staying with family or at a hotel if necessary, can be beneficial. Preparing children for the installation process by explaining what will happen and setting expectations about noise and activity can also reduce stress. Remember, a day or two of disruption leads to years of improved comfort and efficiency in your home with a new HVAC replacement.