How to install hvac ducts in basement
Looking to install hvac ducts in your basement? Here are some tips to get you started!
HVAC Ductwork Installation Basics
Whether you’re installing a new HVAC system or retrofitting an existing one, proper installation of the ductwork is critical to the performance of your heating and cooling system. In this article, we’ll take a look at some in-depth information on how to install HVAC ducts in your basement. The first step is to measure the dimensions of your basement and determine the layout of your ductwork. There are several different ways to configure ductwork, so it’s important to consult with a professional before you begin any work. Once you have a plan, you can start measuring and cutting the ductwork to size. Next, you’ll need to install the main supply trunk line and any branch lines that will serve individual rooms or areas. It’s important to seal all connections with mastic or another type of sealant designed for HVAC use. Once the trunk and branch lines are in place, you can install the register boots and grilles. The final step is to insulate all of the ductwork to ensure proper operation of your HVAC system. Insulation helps keep hot air from escaping in the winter and cool air from escaping in the summer, which can save you money on your energy bills. There are several different types of insulation available, so be sure to consult with a professional before making a selection.
Planning Your HVAC Ductwork Installation
Planning Your HVAC Ductwork Installation 1. Decide where you want the main trunk line to go. This is the large duct that will branch off into smaller sizes. It’s best to keep this line as short as possible to minimize resistance and potential leaks.
2. Measure the longest length and shortest height of all the walls in your basement. These dimensions will help you determine how much material you’ll need to purchase.
3. Choose your materials. There are several different types of ductwork available, so consult with a professional to decide which one is best for your project. Make sure to get all the necessary fittings, clamps, and connectors needed for a proper installation.
4. Cut and fit your main trunk line according to your measurements. Be sure to use sealant around all the joints to create a tight seal. Install any branch lines as needed, making sure to seal each connection point.
5. Insulate all of your ductwork with insulation designed for HVAC use. This will help keep air from escaping and minimize heat loss in the winter months. 6. Install any vents or registers required for proper airflow in each room of your basement according to your HVAC system’s specifications. Your basement is now ready for HVAC ductwork installation!
Installing HVAC Ductwork in Your Basement
Assuming you have a functional heating and cooling system in your home, the next step is to install the ductwork in your basement. While this may seem like a daunting task, it is relatively easy to do with the right tools and a little bit of know-how. The first step is to layout the path that the ductwork will take. It is important to map out the route beforehand so that you can make sure that the ductwork will fit in your basement and so that you can avoid any potential obstacles. Once you have planned out the route, the next step is to cut the necessary pieces of ductwork to size. When cutting the pieces of ductwork, it is important to use a pipe cutter so that you get a clean, straight cut. Once all of the pieces are cut to size, the next step is to assemble them using sheet metal screws. It is important to use screws rather than nails so that you do not run the risk of puncturing the ductwork. Once the ductwork is assembled, the next step is to install it in your basement. This can be done by either attaching it directly to joists or by suspending it from wire hangers. Once the ductwork is installed, you will need to seal any seams or gaps with tape or mastic sealant so that air does not leak out. Installing HVAC ductwork in your basement may seem like a daunting task, but it is relatively easy to do with the right tools and a little bit of know-how. By following these simple steps, you can ensure that your basement will be properly heated and cooled all year long.
Tips for Installing HVAC Ductwork
For many homeowners, the idea of adding HVAC ductwork to their basement is a daunting task. While it may seem like a complicated project, there are some tips that can make the process a bit easier. Here are a few things to keep in mind when installing HVAC ductwork in your basement: -The most important thing to do when installing HVAC ductwork is to make sure that the ducts are properly sealed and insulated. This will help to ensure that your basement is comfortable and that your heating and cooling bills are kept under control. -When installing HVAC ductwork, be sure to use straps or clamps to secure the ducts in place. This will help to prevent them from coming loose over time. -Be sure to measure the space in your basement before purchasing your HVAC ductwork. This will ensure that you purchase the proper size for your space. -If you are not comfortable with installation, be sure to hire a professional contractor who can handle the job for you.
Troubleshooting Your HVAC Ductwork Installation
If you suspect your HVAC ductwork installation is not up to snuff, there are a few things you can do to troubleshoot the issue. First and foremost, check all of your connections to make sure they are secure. If you see any gaps or leaks in the connections, you will need to redo them. Also, check the insulation on your ductwork to make sure it is adequate. If it is not, you may need to add more insulation or replace the existing insulation. Finally, check the orientation of your ductwork. The main trunk line should be oriented in a north-south direction, while the branch lines should be oriented in an east-west direction. This will ensure that your HVAC system circulates air evenly throughout your home. If you find that your ductwork is not installed correctly, contact a professional HVAC contractor to come and take a look.
HVAC Ductwork Maintenance and Repair
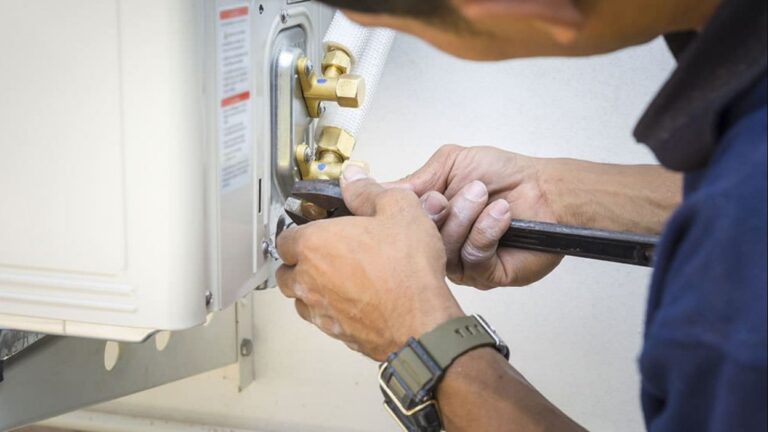
If you have ever gone into your basement and seen exposed ductwork, you may have wondered how effective it is at providing heat or air conditioning to your home. Maybe you’ve even thought about trying to install it yourself. But before you do, there are a few things you should know about HVAC ductwork maintenance and repair. Ductwork is an important part of any HVAC system, and it needs to be properly installed and maintained in order to work effectively. One of the most important things to remember about ductwork is that it should be installed by a professional. While it may seem like a simple enough task, there are a lot of factors that go into properly installing ductwork, and if it’s not done correctly, it can lead to inefficiency and higher energy bills. Another important thing to remember about HVAC ductwork is that it should be inspected on a regular basis. Even if you don’t think there is anything wrong with it, it’s always better to be safe than sorry. If you notice any exposed wires or damaged insulation, make sure to call a professional right away so they can repair the problem before it leads to further damage. If you need HVAC ductwork maintenance or repair, make sure to call a professional who has experience with this type of work. They will be able to properly inspect your ductwork and make any necessary repairs so that your system is running efficiently and safely.
HVAC Ductwork Replacement
HVAC ductwork is responsible for distributing conditioned air throughout your home. Over time, this ductwork can become damaged or disconnected, resulting in poor air circulation and increased energy costs. If your HVAC ductwork needs to be replaced, follow these steps to ensure proper installation.
1. Remove the old HVAC ductwork. This can be done by disconnecting the ducts at the joints and pulling them out of the way. It’s important to be careful not to damage any surrounding insulation or wiring while you’re doing this.
2. Measure the dimensions of the new HVAC ductwork you’ll need. Make sure to get the proper size so that it will fit snugly in place and won’t cause any airflow issues.
3. Install the new HVAC ductwork following the manufacturer’s instructions. Make sure all connections are tight so that there are no leaks. Once everything is in place, test the system to make sure it’s working properly before putting your home’s heating and cooling system back into operation.
HVAC Ductwork Installation Costs
The average cost to install HVAC ductwork is $2,374, with most homeowners reporting paying between $1,590 and $3,178. This price would include the cost of materials and labor to install new ductwork throughout your home. If your home is already outfitted with ductwork but it needs repair or replacement, the costs will be much lower. For example, repairing ducts may cost as little as $350, while replacement might set you back $1,000 or more. In some cases, it may make more sense to replace your entire HVAC system rather than just the ductwork.
HVAC Ductwork Installation Rebates and Incentives
HVAC ductwork installation is a energy-efficiency rebate and incentive program implemented by some electric and gas utility companies to encourage customers to install energy-efficient HVAC systems in their homes and businesses. By installing HVAC ductwork, customers can save money on their monthly energy bills, as well as receive a rebate from their utility company.
HVAC Ductwork Installation FAQs
Installing HVAC ductwork in your basement is not as difficult as it may seem. With a few tools and some basic instructions, you can have your new ductwork up and running in no time. Q: What tools do I need to install HVAC ductwork? A: You will need a few basic tools to install HVAC ductwork, including a measuring tape, a level, a hammer, and screwdriver. Additionally, you will need some sheet metal screws and seals. Q: How do I measure for HVAC ductwork? A: To accurately measure for your new HVAC ductwork, you will need to take some measurements of the area where the ductwork will be installed. Measure the length and width of the space, and be sure to include any obstructions that may be in the way. Once you have your measurements, you can begin cutting the pieces of ductwork to size. Q: How do I cut the pieces of HVAC ductwork? A: To cut the pieces of HVAC ductwork, you will need to use a pair of tin snips. First, mark the measurement on the piece of ductwork with a piece of tape or a pencil. Second, place the tin snips on one side of the mark and cut through the metal. Be sure to make a clean cut so that the two pieces fit together snugly. Q: How do I assemble the pieces of HVAC ductwork? A: To assemble the pieces of HVAC ductwork, you will need to use sheet metal screws and seals. First, align the two pieces of ductwork so that they fit together snugly. Second, use a sealant around all of the edges where two pieces meet. Third, screw the two pieces together using sheet metal screws placed about every four inches along the seam. Fourth, seal around all ofthe screw heads with more sealant for added protection against leaks . fifth test fit by placing end cap on one end(this is why its important to make accurate cuts) if it meets up snugly thencongratulations your ready to install your new hvac system