Step-by-Step Guide to a Professional HVAC Installation
Installing a new heating and cooling system is a complex process that requires careful planning and technical expertise. Modern air conditioners are significantly more efficient than older models, with some being 20-50% larger, allowing for a larger coil and increased efficiency.
Understanding the complete HVAC installation process helps homeowners make informed decisions about their home comfort. Replacing a system over 10 years old with a higher SEER2 model can save homeowners up to 20% on heating and cooling costs.
Key Takeaways
- Proper HVAC installation is crucial for system longevity and energy efficiency.
- Modern air conditioners are more efficient and larger than older models.
- Replacing old systems can save homeowners up to 20% on heating and cooling costs.
- A licensed technician ensures the installation meets local and national codes.
- Understanding the installation process helps homeowners make informed decisions.
Understanding the HVAC Installation Process
Understanding the intricacies of the HVAC installation process is crucial for homeowners looking to upgrade their heating and cooling systems. A successful installation depends on various factors, including proper system sizing, correct installation techniques, and adherence to safety standards.
Why Proper Installation Matters
Proper installation of an HVAC system is vital for ensuring the system’s efficiency, safety, and longevity. A correctly installed system not only provides optimal heating and cooling but also minimizes the risk of costly repairs and reduces energy consumption.
Some key reasons why proper installation matters include improved system performance, enhanced safety, and compliance with manufacturer warranties.
DIY vs. Professional Installation Considerations
While DIY HVAC installation may seem cost-effective, it often leads to expensive mistakes and potential safety hazards. Professional HVAC professionals bring specialized tools and expertise, ensuring a proper system setup that is both efficient and safe.
Key considerations include the complexity of load calculations, handling of refrigerants, and adherence to local building codes and regulations.
Planning Your HVAC Installation

To ensure a seamless HVAC installation, careful planning is essential. This involves several key steps that will help you achieve optimal performance and efficiency from your new system.
Assessing Your Home’s Heating and Cooling Needs
Assessing your home’s heating and cooling needs is the first step in planning your HVAC installation. Factors such as the size of your home, insulation quality, window orientation, and local climate all play a significant role in determining your heating and cooling requirements. A thorough assessment will help you choose the right system size and type.
Choosing the Right HVAC System Size and Type
Choosing the right HVAC system involves considering several factors, including the system’s efficiency rating, energy consumption, and compatibility with your home’s existing infrastructure. It’s crucial to select a system that matches your home’s specific needs to ensure optimal performance and energy savings. As noted by industry experts, “Selecting the right HVAC system can significantly impact your energy bills and overall comfort.
Budgeting for Your New HVAC System
Budgeting for your new HVAC system requires considering not just the upfront cost of the equipment but also installation costs, potential ductwork modifications, and future energy expenses. The average installed cost for central air conditioning can range from $2,900 to $9,000, with higher-efficiency systems offering long-term savings. Many utility companies offer rebates for high-efficiency HVAC installations, which can help offset initial costs.
Finding a Qualified HVAC Professional
Selecting the right HVAC professional is a critical step in the installation process that can significantly impact your system’s performance. A qualified technician ensures that your new HVAC system is installed correctly, operates efficiently, and provides reliable service for years to come.
What to Look for in an HVAC Installation Company
When searching for an HVAC installation company, it’s essential to consider their experience, reputation, and credentials. Look for a company that is licensed, insured, and has a track record of successful installations. Check online reviews and ask for references to gauge their level of customer satisfaction and service quality.
Questions to Ask Potential HVAC Contractors
To ensure you hire the right contractor for your HVAC installation, ask the following questions:
- Ask potential contractors about their experience with your specific type of HVAC system and whether they’re factory-authorized dealers for the brand you’re considering.
- Request information about their installation process, including how they handle permits, inspections, and compliance with local building codes.
- Inquire about their approach to system sizing and whether they perform Manual J load calculations rather than simply replacing your system with the same size.
- Discuss their installation timeline, including how long the process will take and what preparations you’ll need to make before installation day.
- Ask about post-installation services such as system testing, performance verification, and thermostat programming to ensure everything works properly.
- Request details about maintenance agreements and service plans that can help maintain your system’s efficiency and extend its lifespan.
- Discuss payment terms and financing options, being wary of contractors who demand full payment upfront before completing the installation.
- Inquire about their emergency service availability and response times in case issues arise after installation.
By carefully evaluating potential HVAC contractors and asking the right questions, you can ensure a successful installation process for your home’s HVAC system, providing you with efficient and reliable heating and cooling for years to come.
Pre-Installation Home Assessment
A pre-installation home assessment is a critical step that ensures your new HVAC system is installed efficiently and effectively. This process involves evaluating your home’s specific needs and preparing it for the installation.
The Initial Site Evaluation
The initial site evaluation is a crucial part of the pre-installation process. During this assessment, the HVAC professional will inspect your home to determine the best installation approach. This includes evaluating the area where the HVAC system will be installed, assessing the home’s insulation, and checking for any potential issues that could affect the installation process or the system’s performance.
Preparing Your Home for Installation Day
To ensure a smooth installation process, there are several steps you can take to prepare your home. This includes clearing access paths to all work areas, removing furniture and decorations from the surrounding areas, and securing pets and children away from the job site.
- Clear access paths to all work areas to facilitate easy movement of equipment.
- Remove furniture and personal items from areas surrounding the installation locations.
- Secure pets and plan activities for children away from the installation area.
Additionally, it’s a good idea to cover furniture and belongings in adjacent areas to protect them from dust and debris. You should also inform your security company about the scheduled work and make necessary parking arrangements for the installation team.
| Pre-Installation Task | Description | Importance Level |
|---|---|---|
| Clear Access Paths | Clear doorways, hallways, and stairways for equipment movement | High |
| Remove Furniture | Remove items from areas surrounding installation locations | High |
| Secure Pets and Children | Keep them away from the job site for safety and to prevent interference | High |
| Protect Belongings | Cover furniture and items in adjacent areas to prevent damage | Medium |
| Inform Security Company | Notify them of the scheduled installation to avoid false alarms | Medium |
Comprehensive HVAC Installation Steps

The HVAC installation process involves several critical steps that ensure the system operates efficiently and safely. Understanding these steps can help homeowners appreciate the complexity of the installation process and the importance of hiring a qualified professional.
Step 1: Removing the Existing HVAC System
Removing the existing HVAC system is the first step in the installation process. This involves carefully disconnecting and removing the old unit, taking care not to damage surrounding components or ductwork. Technicians must also ensure that all electrical connections are safely disconnected before removal.
Step 2: Refrigerant Recovery and Disposal
The next step is the recovery and disposal of refrigerant from the old unit. This is a critical step due to the environmental impact of refrigerants. Technicians use specialized equipment to recover the refrigerant, which is then disposed of according to environmental regulations.
Step 3: Disconnecting Electrical Components
Disconnecting electrical components is a crucial step that requires attention to detail. The process begins with shutting off power at the main electrical panel to ensure technician safety. As noted by industry experts,
“Proper electrical disconnection is key to a safe and successful HVAC installation.”
Theservicedisconnect box, which provides emergency shutoff capability for the HVACsystem, is carefully disconnected from both the power supply and theunit.
The electrical disconnection process involves several key steps, including:
- Identifying and labeling all connections before disconnection
- Disconnecting the service disconnect box from both the power supply and the unit
- Carefully tracing and disconnecting low-voltage control wiring
- Inspecting all electrical components for signs of damage or code violations
Preparing the Installation Area
Preparing the installation area is a critical step in the HVAC installation process that directly impacts the system’s efficiency and lifespan. A well-prepared installation area ensures that the new HVAC system operates optimally and provides reliable service for years to come.
Leveling and Creating a Proper Foundation
A crucial aspect of preparing the installation area is ensuring that the foundation for the HVAC unit is level and stable. Modern air conditioners are often larger than their predecessors, which can affect the suitability of the existing location for the new unit. A level foundation is essential to prevent vibrations and noise, and it also helps in maintaining the structural integrity of the unit.
As noted by industry experts, “A proper foundation is key to the longevity and performance of the HVAC system.” Creating a proper foundation involves assessing the current site and making necessary adjustments to accommodate the new unit’s size and weight.
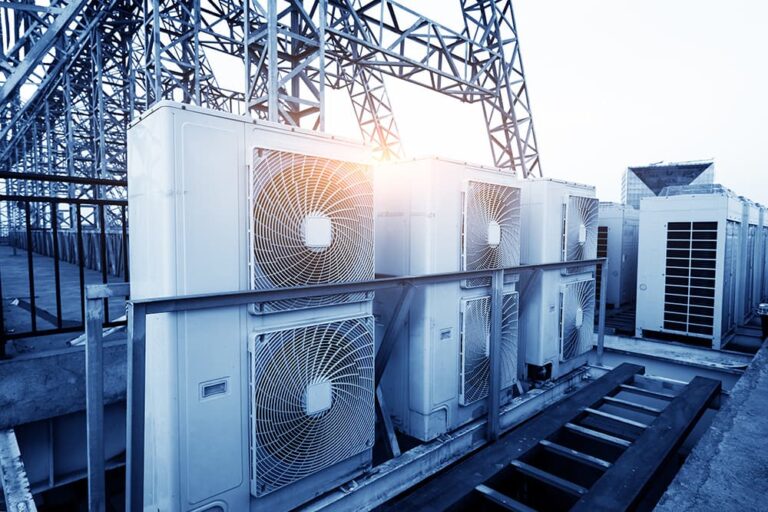
Space Requirements and Clearances
Adequate space around the HVAC unit is vital for ensuring proper airflow, facilitating maintenance, and complying with local building codes. Manufacturer specifications typically require specific clearances around outdoor units, usually ranging from 12-24 inches on the sides and 48-60 inches above the unit.
- Outdoor units should be positioned to avoid obstructions such as dryer vents, high-traffic areas, and locations prone to debris.
- Indoor components require sufficient clearance for service access, typically 24-30 inches in front of the unit.
- Local building codes and manufacturer specifications must be consulted to ensure compliance, with inspections often required to verify adherence to these standards.
Proper placement also considers noise impact and future maintenance needs. By carefully planning the installation area, homeowners can ensure their new HVAC system operates efficiently and effectively.
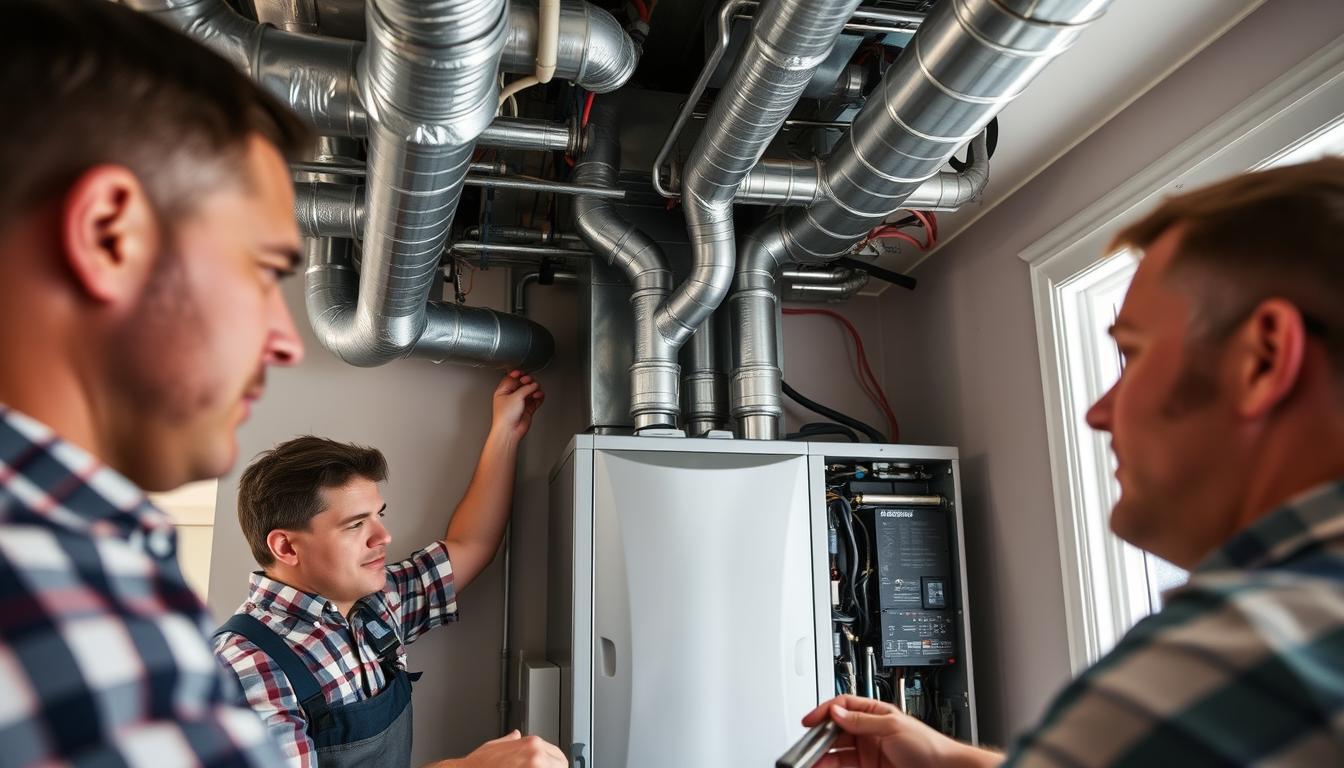
Installing the Indoor Components

Properly installing the indoor components of your HVAC system is essential for its overall performance. This process involves several critical steps that ensure the system operates efficiently and effectively.
Evaporator Coil Installation
The evaporator coil is a crucial component of the HVAC system, responsible for cooling the air. Before installing the new coil, the sheet metal plenum must be disconnected. This can be challenging, especially when access is restricted by surrounding structures like closets or finished basements.
To ensure proper airflow, technicians must carefully align the coil and secure it in place. The supply plenum, which is the sheet metal box above the coil, must be properly sized and shaped to match both the coil output and the existing ductwork connections.
Connecting the Furnace and Air Handler
The connection between the furnace and air handler requires precise alignment to ensure proper airflow and system performance. Technicians create a secure connection between the furnace and evaporator coil using sheet metal screws and specialized HVAC tape or mastic sealant to prevent air leakage.
- Return air connections are equally important, with proper sizing ensuring the system receives adequate airflow for efficient operation.
- Electrical connections between the furnace and air handler are established to coordinate operation, allowing the air handler fan to run during both heating and cooling cycles.
- Control wiring is installed to connect the thermostat to both heating and cooling components, enabling seamless operation of the complete system.
- Condensate drain lines are connected to the evaporator coil and routed to appropriate drainage points, with secondary overflow protection installed as required by code.
After connections are complete, technicians verify proper airflow through the system using specialized testing equipment to ensure optimal performance.
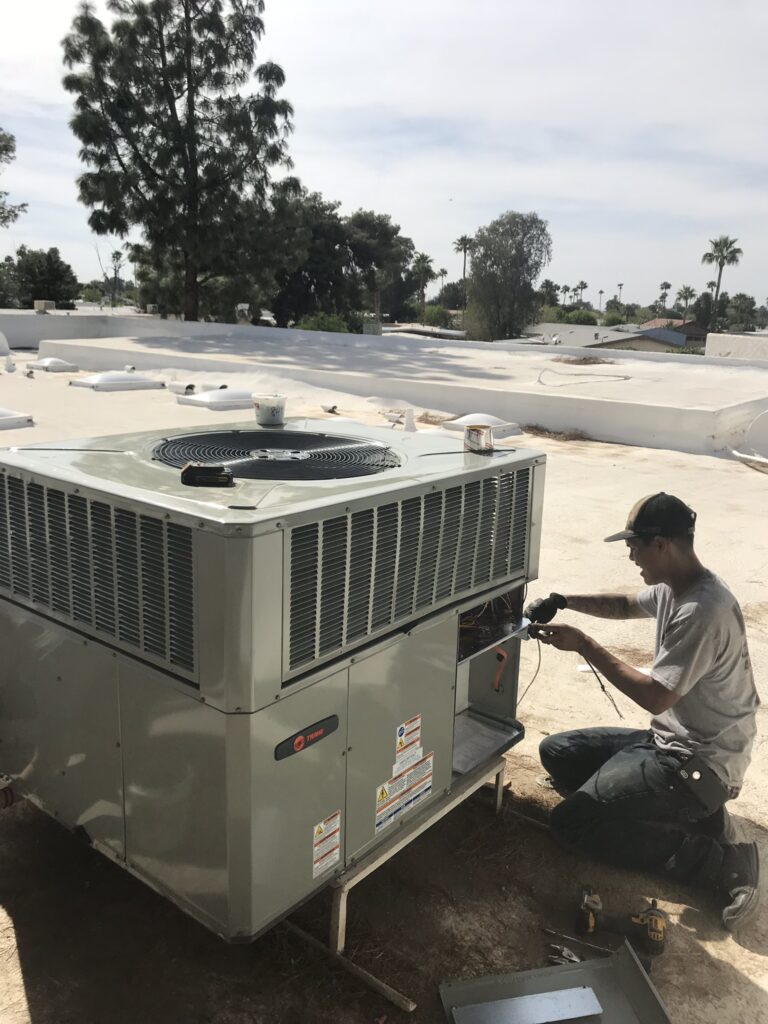
Setting Up the Outdoor Condenser Unit
A well-installed outdoor condenser unit is the backbone of a reliable and efficient HVAC system. The outdoor condenser unit plays a critical role in the overall performance of your air conditioning system, and its setup involves several key steps.
Proper Placement and Positioning
The placement and positioning of the outdoor condenser unit are crucial for its efficient operation. It should be located in a well-ventilated area to ensure proper airflow. The unit should be positioned on a level surface, and it’s essential to maintain adequate clearance around the unit to facilitate maintenance and airflow.
Key considerations for placement include:
- Ensuring the unit is not obstructed by vegetation or other objects.
- Maintaining sufficient clearance around the unit.
- Leveling the unit properly to prevent vibration and noise.
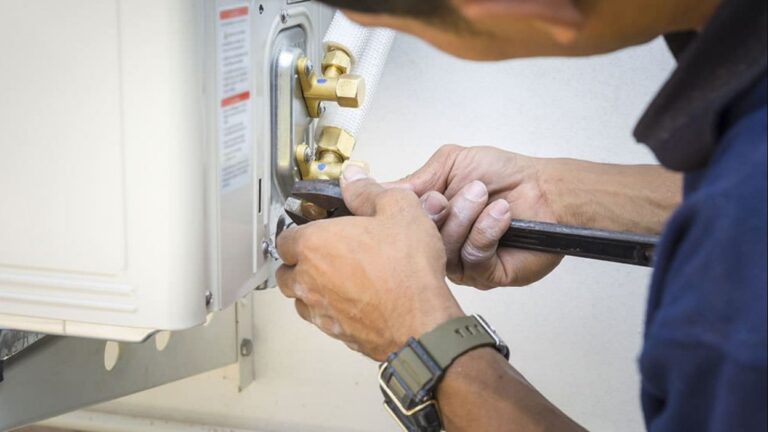
Connecting Refrigerant Lines
Connecting the refrigerant lines is a critical step in setting up the outdoor condenser unit. These lines must be connected securely to prevent refrigerant leaks. The connection process involves brazing the lines to the unit, ensuring a strong and leak-tight seal.
Best practices for connecting refrigerant lines include:
- Using proper brazing techniques to prevent leaks.
- Ensuring the lines are properly sized for the system.
- Minimizing the time the lines are open to the atmosphere to prevent moisture contamination.
Installing the Filter Drier
The filter drier is a vital component that removes moisture and contaminants from the refrigerant system. It’s essential to install the filter drier correctly to protect the system from damage.
Key aspects of filter drier installation include:
| Installation Aspect | Description |
|---|---|
| Location | Typically installed on the liquid line near the indoor coil. |
| Orientation | Positioned according to the flow direction arrow marked on the drier. |
| Connection | Brazed into the liquid line using careful techniques to ensure a leak-free installation. |
As emphasized by industry experts,
“The filter drier is a critical component that protects the compressor and expansion valve from damage caused by moisture and contaminants in the refrigerant system.”
Connecting the System Components
Once the indoor and outdoor units are in place, the next crucial step is connecting the various components of your HVAC system to ensure it operates efficiently and effectively.
Refrigerant Line Installation
The refrigerant lines are critical for the operation of your air conditioning system. These lines must be properly sized and insulated to prevent energy loss and ensure efficient cooling. The installation process involves carefully connecting these lines to the indoor and outdoor units, making sure all connections are secure and leak-free.
Electrical Wiring and Connections
Proper electrical wiring and connections are vital for the safe and efficient operation of your HVAC installation. This involves connecting the thermostat, indoor unit, and outdoor unit according to the manufacturer’s instructions. It’s essential to ensure all electrical connections are secure and meet local electrical codes to prevent any potential hazards or damage.
Condensate Drain Line Setup
The condensate drain line is responsible for removing water produced during the cooling process, directing it to a floor drain or condensate pump. To prevent damage or leaks, this line must be properly secured, typically with concrete, and installed with a slight downward slope to ensure air doesn’t get trapped. Key considerations include:
- Ensuring the primary drain line is installed with a minimum slope of 1/8 inch per foot.
- Incorporating a secondary or overflow drain line as a backup measure.
- Using condensate pumps when convenient drainage options are not available.
- Proper venting of the drain system to prevent airlocks.
- Including clean-out access points for maintenance.
After installation, the drain lines should be tested by pouring water through them to verify proper flow and identify any potential blockages or leaks before the system is operated.
Testing and Commissioning Your New HVAC System
After the installation of your new HVAC system, the next crucial step is testing and commissioning to ensure it operates efficiently and effectively. This process is vital to guarantee that your system provides the desired comfort and energy efficiency in your home.
Initial System Startup Procedures
The initial system startup involves verifying that all components are properly installed and functioning as expected. A University Park HVAC technician will walk you through the startup process, ensuring that the system is safe and ready for operation. This includes checking for any potential issues and addressing them promptly.
Performance Testing and Adjustments
Performance testing is conducted to evaluate the system’s efficiency and effectiveness. Technicians will assess various parameters, including temperature outputs, airflow, and refrigerant levels. Any necessary adjustments are made to optimize the system’s performance, ensuring it operates within the manufacturer’s specifications and provides the desired comfort level.
Thermostat Programming and Operation
Thermostat programming is a critical aspect of the commissioning process. Technicians will configure the thermostat settings according to your preferences, including setting the time, date, and system type. They will also program heating and cooling schedules to balance comfort and energy efficiency. For smart thermostats, this includes connecting to your home’s WiFi network and installing the associated smartphone app for remote control capabilities.
As emphasized by a leading HVAC expert, “A well-programmed thermostat is key to maximizing the efficiency of your HVAC system and reducing energy costs.” Your technician will also provide hands-on training on how to adjust settings, create schedules, and access maintenance reminders, ensuring you’re fully comfortable with the operation of your new system.
Post-Installation Care and Maintenance
To get the most out of your new HVAC system, understanding post-installation care and maintenance is essential. A few days after the install, a technician will perform a follow-up inspection to ensure your system is working correctly.
Regular maintenance is crucial for maximizing system efficiency and extending its lifespan. This includes tasks such as replacing the air filter every 1-3 months and scheduling professional service twice yearly.
- Seasonal inspections before peak heating and cooling seasons ensure your HVAC system is ready for heavy use.
- Professional maintenance includes cleaning coils, checking refrigerant levels, and inspecting electrical connections.
- Keeping the outdoor unit clear of debris and vegetation is vital for maintaining airflow and efficiency.
- Many service companies offer maintenance agreements that provide priority service and discounted repairs.
By prioritizing regular maintenance, you can ensure your system uses 15-20% less energy and provides better comfort while experiencing fewer breakdowns throughout its life.